How to hang pictures on plaster walls
Plaster walls, with their timeless charm and sturdy construction, are a staple of many older homes and buildings. While they exude character and elegance, hanging pictures and artwork on plaster walls can pose a challenge for even the most seasoned decorators. Unlike drywall, which is relatively easy to penetrate, plaster walls require a bit more finesse and care to avoid damage and achieve a secure and aesthetically pleasing display. In this guide, we’ll explore the techniques, tools, and tips for mastering the art of hanging pictures on plaster walls, ensuring that your artwork stays securely in place while preserving the integrity of your walls.
1. Assessing Your Wall:
Before hanging any pictures or artwork, it’s essential to assess the condition of your plaster walls. Look for any signs of damage, such as cracks, chips, or flaking plaster, as these areas may be more susceptible to further damage from hanging hardware. If your walls are in poor condition, consider repairing them before attempting to hang anything heavy or substantial.
2. Choosing the Right Hardware:
When it comes to hanging pictures on plaster walls, the right hardware can make all the difference. Opt for sturdy hanging hardware designed specifically for plaster walls, such as picture hooks with hardened steel nails or wall anchors with screws. These hardware options are designed to penetrate plaster without causing excessive damage and provide a secure hold for your artwork.
3. Locating Studs or Support Beams:
In many cases, the best way to hang pictures on plaster walls is to anchor them directly into studs or support beams behind the plaster. Use a stud finder to locate these structural elements, then mark their positions on the wall. When hanging heavier or larger pieces of artwork, anchoring them into studs will provide added stability and prevent them from pulling away from the wall over time.
4. Preparing Your Wall:
Before installing any hardware, it’s essential to prepare your wall to ensure a secure and stable hanging surface. Use a clean, dry cloth to wipe down the area where you plan to hang your artwork, removing any dust, dirt, or debris that could interfere with the adhesion of the hanging hardware. For particularly stubborn or textured areas, you may need to use a mild detergent solution to clean the surface thoroughly.
5. Marking Your Hanging Points:
Once you’ve located your studs or support beams and prepared your wall, it’s time to mark your hanging points. Use a pencil to make light marks on the wall where you plan to install your hanging hardware, taking care to ensure that your marks are level and evenly spaced. For larger pieces of artwork, consider using a level or measuring tape to ensure precision and accuracy in your placement.
6. Installing Hanging Hardware:
With your hanging points marked, it’s time to install your hanging hardware. If you’re using picture hooks with nails, gently tap the nails into the wall at your marked hanging points, taking care not to apply too much force to avoid damaging the plaster. For wall anchors with screws, use a power drill with a masonry bit to create pilot holes at your marked hanging points, then insert the anchors and screws securely into the wall.
7. Hanging Your Artwork:
Once your hanging hardware is installed, it’s time to hang your artwork. Carefully lift the artwork and align it with the hanging hardware, then gently lower it onto the hooks or screws. Use a level to ensure that your artwork is hanging straight and evenly, making any necessary adjustments as needed. For larger or heavier pieces of artwork, consider enlisting the help of a friend or family member to assist with lifting and hanging.
8. Finishing Touches:
With your artwork securely in place, take a step back and admire your handiwork. If necessary, make any final adjustments to ensure that your artwork is hanging straight and level. Consider adding felt pads or bumpers to the back of your artwork to prevent it from scratching or damaging the wall over time. Finally, step back and enjoy your beautifully curated gallery wall, knowing that your artwork is securely and safely hung on your plaster walls.
9. Consider Alternative Hanging Methods:
If you’re hesitant to install hardware directly into your plaster walls, consider alternative hanging methods such as adhesive hooks or picture hanging strips. These options provide a temporary and damage-free solution for hanging lightweight artwork and can be easily removed without leaving behind any residue or damage to the wall.
10. Experiment and Have Fun:
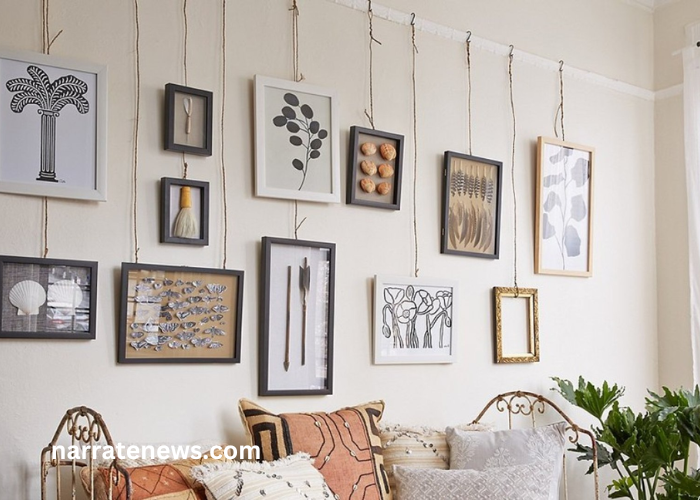
Hanging pictures on plaster walls may require a bit of patience and trial and error, but don’t be afraid to experiment and have fun with it. Mix and match different sizes, shapes, and styles of artwork to create a dynamic and visually interesting gallery wall. Remember that the process of hanging pictures is as much an art form as the artwork itself, so embrace the opportunity to express your creativity and style.
Conclusion
In conclusion, mastering the art of hanging pictures on plaster walls requires careful planning, the right tools and hardware, and a bit of patience. By assessing your wall, choosing the appropriate hanging hardware, and following proper installation techniques, you can create a secure and visually stunning display of artwork that enhances the beauty of your plaster walls. So roll up your sleeves, gather your favorite artwork, and let your creativity shine as you transform your space into a gallery-worthy masterpiece.
Related Posts

nike:3ryxln2__cc= shoes

Color:ynhbe-p2w-w= Aquamarine